I was reading the comments posted on my blog (I read all of them, try to get back with everybody - but I'm not perfect and don't always get to, but I do READ all of them, every single one). I love comments. I just get giddy when I realize that I have a comment to read. So thank you to everyone that leaves comments.
Anywho, as I was saying...I was reading the comments and I went to check out who wrote them (I do this to every comment too - if you are a blogger and you post a comment, I go to your blog) and I found this really cute tutorial on saving little girls overalls. You can check it out here. I really want to do this, but I don't think my boys would appreciate it.
So check out the blog I just found (while you are there, tell her I said 'Hi'), leave me comments on any post and I will check out your blog too.
Sunday, June 27, 2010

Monday, June 14, 2010
Progress Report
I weighed this morning and weigh 144.8 lbs. That's a loss of 1.2 lbs. this week (for a total of 5.8 lbs.). That's not much, but I guess it's better than gaining. I really should try her exact menu (it seems expensive - just by looking at it, but I haven't priced it in the store), to see if I would actually lose more weight.
One day, I got really busy and didn't do my daily dozen exercises and more times than not, I didn't make time for the fidgetcizers either. So, maybe all in all I haven't done too bad.
I am not loosing weight/inches in my stomach/abs area like I would like to. That is my bad area (o.k. - it's all bad, but that's my worst area). I seem to be loosing it more in my thighs, than my abs.
So, here's what I've decided to try to do. I am still doing my Daily Dozen exercises (each morning) as Denise suggests (she targets different areas on different days), and then late afternoon, I am going to do my ab toning exercises too. (She has a section that is devoted just to abs. She suggests doing them 3 times a week, I had been doing them once or twice, but not 3 times - so I am going drastic, I'm going for 7 days a week - maybe that will really get my stomach flatter and tighter.)
Wish me luck. It's going, but not too well.
Monday, June 7, 2010
mom4

Here is a shirt I just did using Freezer Paper Stenciling.
Last year at the MOPS convention, I saw some shirts that had mom to the nth power (however many children she had). I fell in love with it, but it came in black and white or pink and brown (which I know I am a girl, but I'm not a pink person plus I have boys). Those really were the only 2 options that I saw and I wasn't fond of either of them.
I have had that shirt on my mind ever since then. I began to think about it a lot after I attempted freezer paper stenciling here.
I have gotten on a red and brown kick lately. I really like that combination (one of my boys has a plaid shirt: red, white, brown and teal - really like it alot). So I purchased a red T-shirt at Wal-Mart for $4 and some brown ("Earth Brown") acrylic paint for less than $2. I used freezer paper than I already had on hand and an inexpensive makeup sponge (to apply the paint).


I printed my slogan in a font I liked large enough to show up on a T-shirt. Then I traced it onto the paper side of the freezer paper and I used small scissors to cut it out. (This is where a Cricut would have come in handy - I'm not fortunate enough to have one, so those of you that are - enjoy it and know that I suffer severely because I don't have one. Joking, but just slightly.)

Then I ironed the freezer paper to the shirt (making sure it is centered).

I placed freezer paper inside the shirt (look at the collar) to keep the paint from bleeding through to the back of the shirt.

After I ironed the freezer paper stencil on my shirt, I applied the brown paint.

I pulled the freezer paper off while the paint was still wet.

Now I need to get my tweezers to remove the inside of the "o" and "4." I should have let it dry just a little more because my tweezers smeared the brown paint.

Here's the finished shirt.
Now I need to get me a large beaded teal necklace to top it off.
[I have a brown long-sleeve T-shirt that I can wear under the red short-sleeve shirt in cooler weather.]
My Progress
O.k., here is my weekly progress. I know you don't really care, but posting here keeps me accountable and I hope it inspires you (because if I can do it - anybody can).
I am still at 146 lbs. (total weight loss = 4.4 lbs.) and this time I am not disappointed (actually relieved). This past week has been a crazy week and I am just grateful that I did not gain any. (Really - we had our MOPS Steering Team Retreat and the ladies all brought wonderfully yummy snacks and I have no self-control.) I also drank a few cokes, don't think I got all of my water in.
I was able to do my Daily Dozen Exercises everyday, wasn't able to walk or jump rope, wasn't able to do any of the fidgetcisers either. I am lucky that I didn't gain weight. I will try to get back on track and see if I can do better this week.
At the beginning (3 weeks ago) I took my measurements. I will not bore you with all of those details, but I will tell you the measurements that Denise Austin recommends you taking.
Waist (at the skinniest part, if it is all about the same, take it around your belly button)
Hips (at the widest part)
Left Thigh
Right Thigh
Chest
Left Upper Arm
Right Upper Arm
Left Vertical Buttocks
Right Vertical Buttocks
Sparing you all the gory details, my total loss in inches from 3 weeks ago today, drum roll please........................8 inches! Wow, I am impressed. I was not expecting that. Best part: I really wasn't able to tell that I was losing inches (I mean 1/2 inch here and so forth, it wasn't that noticeable to me), but DH said he could tell.
I am unable to tell much by the way my clothes fit (not loose enough yet), but according to the scales, tape measure and DH this "Life Change" (as Denise calls it) is working. I am hoping that my clothes will feel better and look better on me real soon. Anyway, I am encouraged with my results and will continue and not give up (which is what I normally do when I don't get results or don't get results fast enough).
Tuesday, June 1, 2010
Previous MOPS Creative Activity

I have been wanting to blog on this for awhile, but I kept forgetting. Our MOPS Creative Activies person was fantastic. She had lots of great ideas, but I have this particular fondness for totes so I really liked this CA (creative activity). (I have some kind of tote fettish. I love tote bags, I absolutely love totes!!!!!!!)
So the one pictured above is the one I made. Yes, we all made one at our MOPS meeting. So you want to know the secret? It's a 'No Sew Tote'. Of course you can't use it for anything like a library/book bag (or for anything heavy), but it's a great all around tote. I have been using it to carry the snacks in for my Sunday morning class. Our CA person got the idea here.
So those of you that don't sew, even you can make this. If you sew and want to sew it (to make it sturdier), go right ahead. But it is a great, quick project (even if you do sew, try it out).
Spongebob Cake and Cupcakes
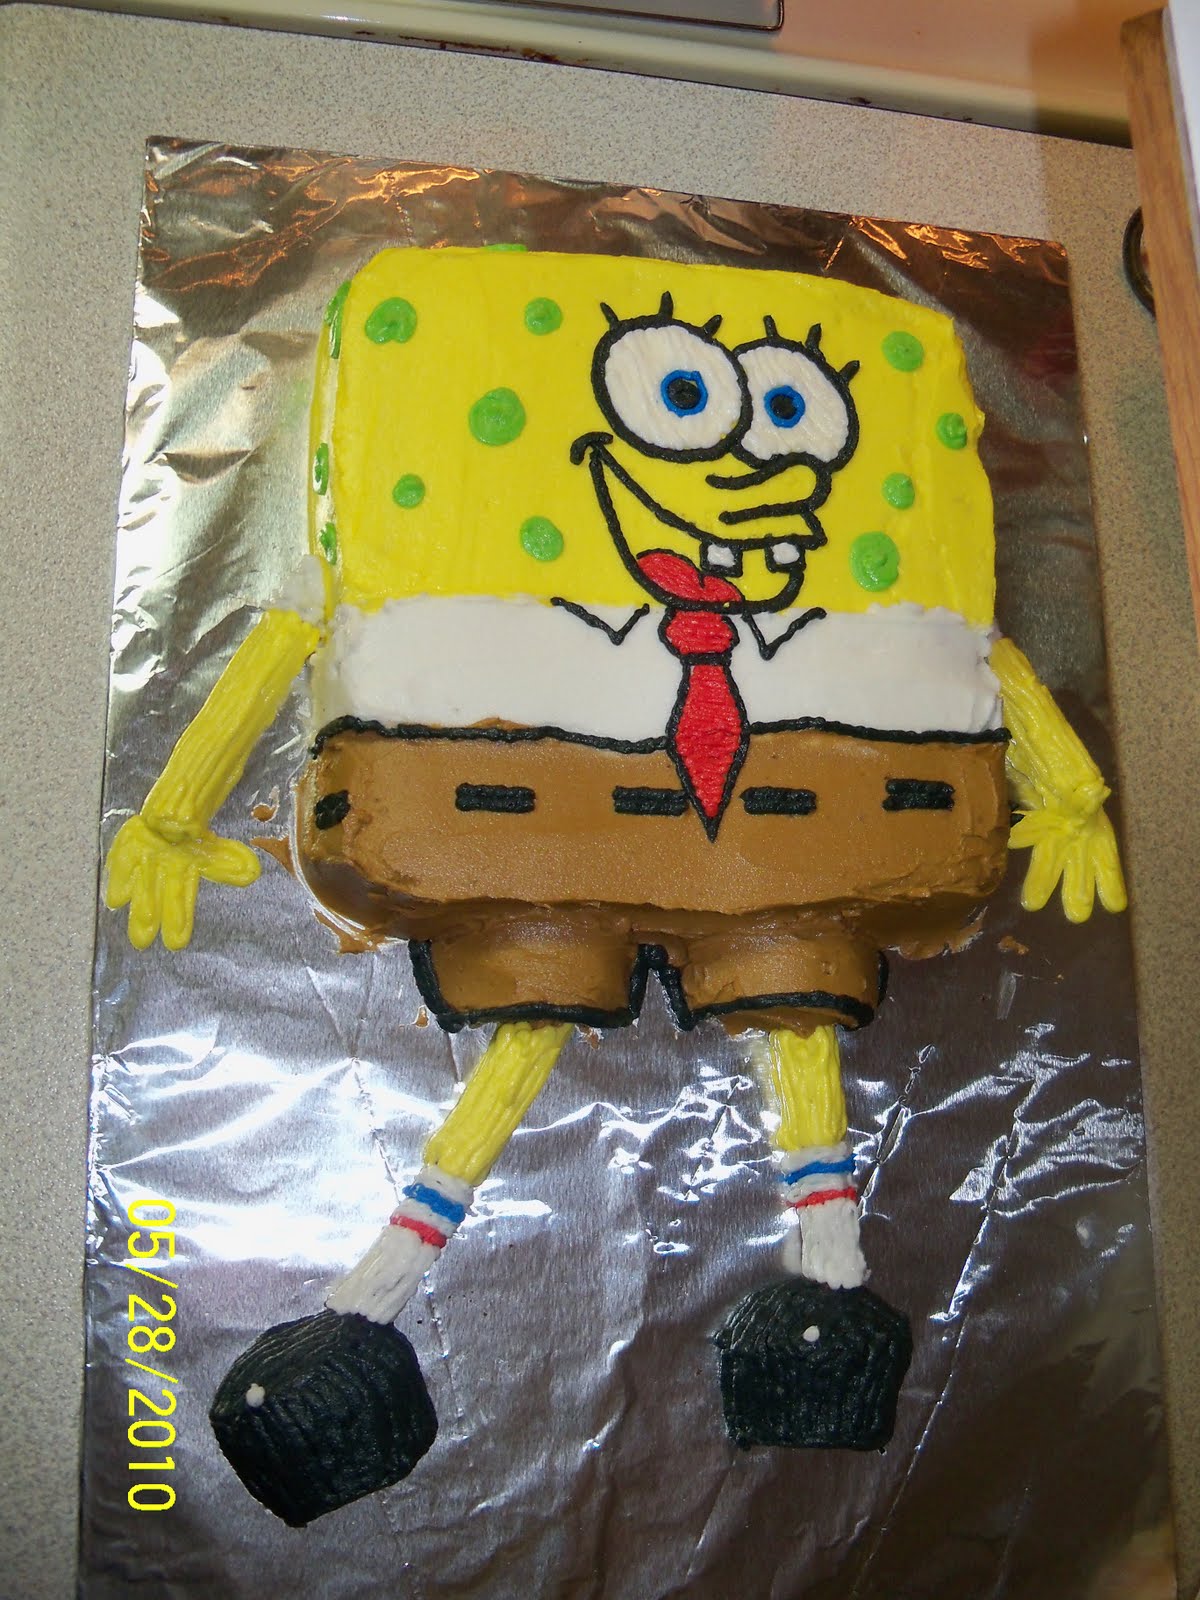
For the birthday party this past weekend, Anthony said he wanted a Spongebob cake. I asked Champ what he wanted (I usually do 2 cakes, one for each of them) and he said whatever Anthony wanted.
Frank helped. He's really good about that. He helps with most of my cakes. (I took lessons, but he's a natural.)

Can you see the picture (that I printed off of Google Images of Spongebob) above the cake? That was what I was trying to model him after. I used pretzel rods for the arms and legs (to give them a 3D look). I used a cupcake, cut the top off and then cut it in half, turned it upside down and those became his pant legs. I took another cupcake and cut it in half and used those for the shoes. The shoes don't look quite like I wanted them too, but maybe next time. I just used a plain 8" square pan for Spongebob. (I really don't like the character pans, you are really limited by them.)

So I just had to do one cake this year. That's nice, but
just immediate family (Frank comes from a large family) we had about 30 people here (just with Grandparents, Aunts, Uncles, Cousins, Parents and Siblings). So I was afraid that 1 cake wouldn't be enough.
I had been wanting to try the rainbow cupcakes that I have seen all over the blogoshpere. So this was my chance and I took it. I was pleased with how they turned out (messy to make, but turned out good).
(I forgot to get a picture of the different colored batter, but here are the empty bowls. Don't you just want to lick them? Me too, but I didn't.)

Here is the batter (red, green, blue, yellow) in freezer zip-loc bags (just cut the tip off, very small cut - don't cut the hole too big).

Here they are in the muffin cups (I forgot to take a pic before I put them in the oven, don't look at my dirty oven - hey, I caught you).

Here they are right out of the oven.

Here they are frosted. Lee liked how the paper cupcake liner looked tie-dyed when he took it off.


You can do so much with the 'rainbow cupcake,' the possibilities are endless (think holidays: red, white & blue, red & green; think schools/sports teams: purple & gold, black & gold, red & blue; do you see where I am going?).
Subscribe to:
Posts (Atom)


