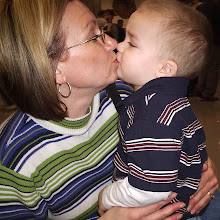
This should probably go on a MHRF (My Husband Rocks Fridays) post (but I always seem to forget on Friday).
I found this poem that I wrote to my husband ages ago, I could probably write more due to the fact that my love for him still continues to grow each day. I am not a poet, but I think you will get it.
God Made A Husband
God wanted someone strong enough to be the "Head of the House,"
yet gentle enough to hold his wife when she cried,
so, God made a husband.
God wanted someone hardworking enough to work his 40 hours,
then come home and spend his day off helping his wife do her chores,
so, God made a husband.
God wanted someone tender enough to hold his new baby,
yet had enough strength to be both protector and provider,
so, God made a husband.
God wanted someone kind enough to take time out of his busy schedule to cuddle with his wife,
but afterward willing to work twice as hard to catch-up on what he let slide,
so, God made a husband.
God wanted someone firm enough to discipline his family when necessary,
but He also wanted someone soft enough to hug and kiss his family when he was finished,
so, God made a husband.
God wanted someone patient enough to have a hard day at work,
and is still able to sit quietly by and listen to his wife unburden her load on him,
so, God made a husband.
God wanted someone willing to work hard at paying the bills (sometimes requiring him to work two jobs),
and still willing to spend time working around the house, playing with his family, and whatever else they wanted or needed him to do,
so, God made a husband.
God wanted someone who would "leave his father and mother and cleave to his wife," but loved his family enough to keep them a part of his new life,
so, God made a husband.
God wanted someone willing to do all that a wife required of him,
but still be willing to lay down his life for her and "love her as Christ so loved the Church,"
so, God made a husband.
I believe with all my heart that God made you just for me. Thank you Lord.
~Jena
2-26-97
Monday, January 11, 2010


Wrapping Paper Roll Organizer

I saw this years ago (I believe on the Carol Duvall show, but I Googled it - actually Swagbucked it, but it just doesn't have the same ring to it - and couldn't find anything). I immediately made it and love it. I really don't know how long that I've had it, but it has held up great.
I took 2 strips of grosgrain ribbon 120" long each. (I used a 2 1/2 inch wide blue - because I already had that on hand and didn't have to purchase anything.) You could use any kind of ribbon to suit your decor (I love grosgrain and it holds up very well).
I made a loop and sewed the 2 ends together (I sewed a small rectangle instead of a straight line to make it a little more durable - not sure if that's how the directions said to do it or not - too long ago to remember). That becomes the bottom (so you don't see the sewn rectangle).

Then with the rectangle at one end, fold the loop in half. If you were to crease it (do NOT crease it), the part that you would crease would be the top. I then sewed a line across the top (a few inches down from where the crease would be if you creased it) of each ribbon forming a loop to hold a dowel rod (again I used a large one because that was what I already had on hand, but you really don't want a small flemsy one, you need one that will hold up). (Measure, both ribbons have to match, what you do to one ribbon - you have to do the exact same thing to the other ribbon or it will be crooked and won't work properly.) You also need to make sure your dowel rod will fit inside. You can staple the ribbon to the top of the dowel rod to keep it in place, I did not so that I can slide the ribbon wider apart for longer rolls of paper or slide them closer together for shorter rolls of paper. I also made it tight around my dowel rod so that it doesn't slip on it's own.

I then measured 12" down from the line that I sewed right under the dowel rod and sewed another line straight across both ribbons (to make a "pocket"). I then measured every 8" and continued to make "pockets".

I then got an over the door wreath holder (again because that's what I already had on hand) and centered my dowel rod on it and hung it on the back of my laundry room/craft room door. If you slam the door the rolls of paper will fall out or the dowel rod will shift on the wreath holder (I have never had the dowel rod to fall off though).
You can now place your rolls of wrapping paper in the loops or "pockets." I also have kraft paper (I love, love, love the stuff), aida cloth for cross-stitching that comes in tubes, rolls of clear contact paper, or whatever comes in a roll. This way the ends don't get damaged standing up in a box or something. This would be great to hang on the back of a closet door or any where out of the way.
I made this so long ago, that I don't actually have a real tutorial to explain the steps (I tried to take pictures the best I could with a finished product) and I may have left out a step or two (again because it was so long ago since I made it). If you have any questions, feel free to e-mail me and I will try to answer them the best way that I can.
Sunday, January 10, 2010
7 Can Soup Recipe

Frank and I aren't really soup/stew people (about the only things we eat that are in that category are chili and vegetable beef stew), but we really like this recipe. A man from church made it and brought it to church fellowship once and I just had to get the recipe.
Here is the original recipe (below that are my little personal changes).
7 Can Soup
Brown 1 1/2 lbs. ground chuck, cook and drain; add 1/2 C diced onions - cook a few minutes longer.
Add: 1 can Rotel tomatoes
3 cans minestrone soup
2 cans pinto beans (drain part of liquid off)
2 cans diced tomatoes
Mix all together and simmer at least 20 min. Sprinkle grated cheese over soup and serve with Frito Scoops.
Note: I used 2 cans minestrone soup (because that's all I had) and I substituted 1 can of pinto beans for 1 can of black beans (I like black beans). Salt and pepper or garlic salt to taste. I also try - when I can - to use my own beans that I have cooked and frozen. This is great served with Mexican Cornbread.
Occasionally I brown ground beef ahead of time for soup/chili/casseroles and freeze. Makes mealtime faster.
I like to throw all this in the crockpot (except the minestrone soup - see below) and let it slow cook all day, then shortly before serving add the minestrone soup. (Because of the noodles in the minestrone soup, the noodles will get soggy if cooked in a crockpot all day especially since they were cooked in order to can them first.)
Basement Remodel 2
Here is the rest of the sheetrock finished (covering the bottom of the stairs and leading to the living area of the house). We had 2 walls that we left cinderblock.


I finally decided what I wanted. I wanted a "Barn" basement. I know this is not for everybody, but it was what I wanted. We live on a farm, I have 4 very tuff and tumble boys. I thought it would be perfect for us.
So here is the beginning of the "Barn" basement. I wanted the corrugated metal (normally used for barn roofs) on the bottom half of the walls and I wanted the top part painted barn red and trimmed out with barn wood. Before we did too much, Frank did one small wall in the metal and barn wood to make sure that it was what I really wanted (you know, sometimes you have something pictured in your mind and it just doesn't turn out like you hoped and imagined).

I was so pleased with it that we were full steam ahead. I was getting excited and couldn't wait. More pictures coming.
I have such a great husband. He actually tore down 2 barns (that were falling anyway) so that I could have actual weathered barn wood.
Basement Remodel Part 1
Basement Remodel Part 3
Basement Remodel Part 4
Basement Remodel Part 5
Basement Remodel Part 6
More Details


I finally decided what I wanted. I wanted a "Barn" basement. I know this is not for everybody, but it was what I wanted. We live on a farm, I have 4 very tuff and tumble boys. I thought it would be perfect for us.
So here is the beginning of the "Barn" basement. I wanted the corrugated metal (normally used for barn roofs) on the bottom half of the walls and I wanted the top part painted barn red and trimmed out with barn wood. Before we did too much, Frank did one small wall in the metal and barn wood to make sure that it was what I really wanted (you know, sometimes you have something pictured in your mind and it just doesn't turn out like you hoped and imagined).

I was so pleased with it that we were full steam ahead. I was getting excited and couldn't wait. More pictures coming.
I have such a great husband. He actually tore down 2 barns (that were falling anyway) so that I could have actual weathered barn wood.
Basement Remodel Part 1
Basement Remodel Part 3
Basement Remodel Part 4
Basement Remodel Part 5
Basement Remodel Part 6
More Details
Saturday, January 9, 2010
Basement Remodel
This will probably take a few posts because it is so long and has so many pictures, but here goes...
A couple of winters ago we began to remodel the basement. When we started, I didn't know exactly what I wanted to do, I just wanted a family room down there. I played with lots of ideas, but nothing just "struck" me. We began anyway. [We have a small farm and Frank is an outdoor person, so we just do inside work in the winter months and then when summer rolls around we take a break. So we knew from the very beginning that this would be a 3 year or more project. We also do it as we can afford it, which means a little at a time.] So since we were going to stretch this out, I didn't need to know right away about what I wanted it to look like in the end, that's the reason we started without an end in mind.
We did know that we wanted it "finished" so Frank began to prep it for and hang sheetrock. I began trying to sort through our "stuff" and get rid of what we no longer needed (by trashing when necessary, by donating when we could and selling if we could). Here are some pictures of the basement during the sorting process and Frank's prepping process. I did not take totally "before" pictures, because you wouldn't have been able to tell anything for all the "stuff" that we had accumulated.


Before Frank started there were only cinderblock walls. Then he added sheetrock and he mudded the sheetrock. He even had to build a wall between what was the garage - where we parked the vehicle - and what was going to be the family room. That was in the winter of 2007/2008. I am so thankful that Frank is very handy in that way. He used to build houses for a living before we were married (he built the house that we live in now also).
Basement Remodel Part 2
Basement Remodel Part 3
Basement Remodel Part 4
Basement Remodel Part 5
Basement Remodel Part 6
More Details
A couple of winters ago we began to remodel the basement. When we started, I didn't know exactly what I wanted to do, I just wanted a family room down there. I played with lots of ideas, but nothing just "struck" me. We began anyway. [We have a small farm and Frank is an outdoor person, so we just do inside work in the winter months and then when summer rolls around we take a break. So we knew from the very beginning that this would be a 3 year or more project. We also do it as we can afford it, which means a little at a time.] So since we were going to stretch this out, I didn't need to know right away about what I wanted it to look like in the end, that's the reason we started without an end in mind.
We did know that we wanted it "finished" so Frank began to prep it for and hang sheetrock. I began trying to sort through our "stuff" and get rid of what we no longer needed (by trashing when necessary, by donating when we could and selling if we could). Here are some pictures of the basement during the sorting process and Frank's prepping process. I did not take totally "before" pictures, because you wouldn't have been able to tell anything for all the "stuff" that we had accumulated.


Before Frank started there were only cinderblock walls. Then he added sheetrock and he mudded the sheetrock. He even had to build a wall between what was the garage - where we parked the vehicle - and what was going to be the family room. That was in the winter of 2007/2008. I am so thankful that Frank is very handy in that way. He used to build houses for a living before we were married (he built the house that we live in now also).
Basement Remodel Part 2
Basement Remodel Part 3
Basement Remodel Part 4
Basement Remodel Part 5
Basement Remodel Part 6
More Details
Subscribe to:
Posts (Atom)