Showing posts with label sewing. Show all posts

Thursday, April 25, 2013

Where do you get your creative inspiration?

Where do you get the inspiration for your projects? Whether it is sewing, knitting/crochet, etc. I look around at what pleases me and go from there.

Here is a granny square that I crocheted. The colors are white, brown aqua and burgandy/dark red (yes, I know it looks bright red, but trust me - it is not - don't know if it was the camera or the computer).


I got my inspiration from my favorite tote bag.  It has the same color scheme.


Here they are together.


The colors may not be an exact match (fabric and yarn do not always match), but I like the color scheme anyway.

So where do you get your inspiration?

Sunday, January 16, 2011

Christmas Picture


I made Frank and the boys matching vests. I finished up 2:00 a.m., Sunday, Dec. 26. (So that they could wear them to church that day - Sunday, the day after Christmas.)

I used the pattern McCall's 2447 for Frank's vest and for the boys' vests, I used the pattern McCall's 4290 View B. They are all made out of a beautiful brick red and lined in black satin.

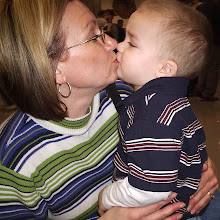
I just happened to have a brick read sweater that I wore. I girl from church took this picture for us in the church annex (with my camera). She did good.

I then, over the internet, sent them to Walgreens and made a bunch of copies. Addressed the back of the picture and sent it out as a postcard. It was our Happy New Year card (since I didn't get Christmas cards sent out).

Thursday, July 15, 2010

Beach Bag Tutorial

Here is a tutorial for the beach bag that I made (you can check out my post on my first beach bag here).

I will be using...
some of the fabric that I teased you with here
fabric scissors
thread to match fabric
fiberglass window screen
old scissors (or buy a cheap pair just for the window screen) - it's easy to cut, but will do in a good pair of scissors
thread to match window screen (this case black)
ribbon
iron on fusible webbing
grommet kit (enough to make 4 grommets) & hammer

First, I took a square piece of fabric and embroidered a phrase that I liked onto it (in this case "Byers' beach gear"). I then ironed fusible webbing onto the back of the fabric (to give it more body), I trimmed the corners (to miter them) and folded & ironed the edges down toward the back of the fabric. Around the edge about 1/8" or 1/4" (depends on the look you want), I straight stitched it. [Try to make it look as nice as you can b/c you can see through the bag and you will be able to see this.]


Using Fiberglass Window Screen (the kind to fix/repair a window screen at home for a DIY project - found at Lowe's for less than $6/roll and was able to get 2 bags out of it and had some left over) I cut a piece 36" x 23 1/2". Fold it in half. Pin the wrong sides together (we will be doing a French seam - this is important, to keep from snagging anything that you put inside the bag).


Pin both sides.


Using a straight stitch, sew up both sides, then trim.


Turn your bag inside out.


Right sides are now together. NOTE: Right and wrong sides will only matter if you sew an embroidered square on one side b/c the screen doesn't really have a right and wrong side.


The French Seam is now complete. You can see that the 'rough' edges are now enclosed.


The next 2 steps are just for explanation - you do not have to do this.
Turn your bag right side out.


Now, on the inside of the bag, there are no rough edges.


We are now going to make a box bottom for your bag. With your bag inside out, find the corner.


Try to get it as square and flat as possible. You will need to finger press your seam to one side (I usually try to press it toward the back, away from the embroidery).


Using a straight edge, mark it with pins straight across. I believe I went down from the tip of the corner 3 inches.


If you have a ruled mat (for quilting) it helps to get the corner square.


Do this for both corners. (Can you see how the mat helps?)


Then stitch a straight line where the pins are. Can you see how it will give your bag a square or box bottom?


Now, carefully scrunch it up and under the presser foot of your sewing machine. You are going to tack down the tip of the corner with just a few zig-zag stitches. You can hand tack this down if you like. I am way to lazy to do that.


Now you can see that both corners are finished. The bottom of your beach bag is complete. (The box bottom will help it to stand up better and will make it easier to put things into and get things out of it.)


See how it can (kind of) stand on it's own?


Cut a piece of fabric (coordinating or matching the piece that you embroidered on) 4 1/2" X 44" (this will be the top piece around the edge of your beach bag) and then cut fusible webbing 3 1/2" X 44". I got the really stiff fusible webbing. (On my first beach bag, I didn't use any fusible webbing and I realized that it needed something.) If your fusible webbing isn't long enough, you can piece it in.


Iron on your fusible webbing. You can see here where I pieced it in.


Now iron the edges of your fabric 1/4" to the back side (fusible webbing).


Fold it in half (wrong sides together/fusible webbing together) and press.


On one end only, fold the end in 1/4" and press. This will lap over the other end and there won't be any raw edges showing.


Now begin folding the piece over the top edge of your beach bag and sew it on 1/8" to 1/4". Begin with the end that is not folded. I like to start at or near a seam.


This is where your folded end will lap over the raw edge. Stitch over the seam and back stitch. I also sewed a vertical line up the seam to keep it from separating - forgot to get a picture of this - you can use a straight stitch if it laps over well enough, if not a zig-zag stitch may be better. (I used a straight stitch on the seam of this bag, but a used a zig-zag stitch on my first bag.)


Now we are going to add grommets. I measured in approximately 1/3 of the width of the bag from the seams (about 8") and put a grommet. There will be 2 grommets on each side (4 total). On my first bag, I didn't use ribbon or grommets. I made 2 handles out of matching fabric and sewed them on (securing them very well so they didn't pull off when the bag was full).


I will use these grommets to put the ribbon handle through and tie a knot. If you are afraid that your knot will pull through, you can get a large bead and tie into your knot to keep from pulling through (see example here).


I held the bag up to me to see how long I wanted my handles (this is a personal preference). You can see that it is a large beach bag, which is what I wanted. You can see about how long I wanted the handles.


Here I have 3 VERY large beach towels in the bag and there is probably room for 1 more.


I didn't think of this, but if I had planned better, I could have made the embroidery patch an outside pocket. Just a thought.

Wednesday, July 7, 2010

Beach Bag


I made this beach bag for my SIL's birthday. I embroidered 'Surf's Up' in red on some navy & white gingham fabric (thought it looked a little nautical) and sewed it on the front (top stitching it with red thread - doesn't show up in the picture). You could use it as a beach bag, pool bag or any other large tote.

My favorite thing about it, is that it is mesh and should allow most of the sand to filter out before getting into your vehicle or house.

Now I want me one (tutorial here - great excuse to make one for me, right?).

There are lot's of great phrases you could use on it, but I can only think of a few so help me out...
Surf's Up
Beach Bag/Beach Gear
Catch the Wave
Pool Bag/Pool Gear
...can you think of more?

Thursday, November 19, 2009

Easy Shorts


For next summer, if you want an easy way to make shorts for your child, here it is!!!

Bandana Pants!!!!

They are quick and easy, but if you have ever worked with bandanas before, you know that they are not a perfect square or rectangle (so that means your shorts won't be perfect). I figured my boys were so active that they couldn't be still long enough for anyone to notice. These are cute play shorts. They are inexpensive and if they get extremely dirty or ripped (I have 4 very tuff and tumble boys), it won't be the end of the world.

You can find the directions here. There are so many different bandanas out there that your possibilities are endless.

Saturday, July 11, 2009

Even More Boys Clothes

Still wrinkled.

The following outfit is a joint effort with a friend of mine, M. She and I couldn't find what we wanted for Easter. She wanted something with long pants (in case it was cool), but still looked springy (is that a word?). She also liked the way her son looks in light blue (he's blond haired and blue eyed). I told her we could make something. She was doubtful. Then the more we talked, we decided we wanted it reversible (you know I like that) and then we both like blue and brown together (so I just had to suggest plaid). And little by little we had designed this outfit in our heads. Now we just had to make it come to fruition. Look below and tell me what you think.........


This is what my 2 youngest boys wore last Easter (2008). I made 2 exactly the same, but I only took pictures of one. It's hard to tell from the picture, but the fabric is blue and brown and white plaid (have I mentioned that I luuuuuuuvvvvvvvvvv plaid?). I appliqued a brown bunny (to look like a chocolate bunny that might be in an Easter basket). I'm not sure if you can tell or not, but it has brown buttons on this side.


Here's the whole outfit. The trim on the collar and sleeves has matching plaid piping. I made it long enough to roll up the pant legs to see the lining (sort of - you know I had to make this reversible, I mean come on, if I'm going to line it anyway, why not?).


Here's the reversed side (blue pique'). I did an ice-cream cone for summer. I usually only applique on one side and have the other side plain, but the plaid material just screamed ice-cream cone at me (I placed it on the bias and I couldn't resist). Plus look how yummy the chocolate ice-cream looks. That makes me hungry, wait right here just a minute while I run get me some.

O.K. I'm back.


See it also brought out the plaid piping on the trim of the shirt. This side has blue buttons.


Here is the whole outfit with the cuff showing the plaid also. This pattern was 'Will' by Collars Etc. It has the regular front with the long jumpsuit.

I made the same outfit for a friend of mine's son for last Easter, but she wanted her's just a little different. (We don't go to the same church, so don't panic - no one thought we were copying each other, besides I wouldn't care if someone did think that - these are our kids and we can dress them how we want to.)


Here's the front of her's. (The ice-cream side is the same.)


She wanted carrots and grass for hers. (I used green jumbo rick-rack for the grass.)

Well, that's all I've got for now. I'll have to dig deeper to see if there is anything else (but I don't think there is). I'm too tired right now to add the links to other clothing that I have made, so until I feel like adding the link you can click on my right side bar and do a search this site for 'boys clothing.' Thanks for being such great readers. I hope you enjoyed what you saw and I hope I have inspired you to have a creative outlet.

Handmade Boy's Clothes

I hope you are not getting tired of seeing these.


This is Corey's Bubble again from Maja's Heirlooms. This time I smocked the letter "R" for Rance. I love plaid. I also love blue and yellow for boys.


This is a close-up of the smocked "R."


This is the Vogue Pattern # 7504 (only I omitted the smocking area). I made the above bubble for Rance and Anthony being 14 months older than he is was a toddler at the time, so I made this Jon-Jon for him to wear (so they would coordinate). When Anthony outgrew this outfit, Rance could wear it.


When Anthony outgrew the Jon-Jon and Rance grew into it, I wanted them to still coordinate and I had a little of the plaid fabric left so I made this outfit for Anthony. It was "John" from Basics for Boys II by Children's Corner. I liked how the shorts buttoned on the shirt and how you could personalize it.


This is the close-up of the personalized name plate. Yes, it is hand-stitched (I didn't have an embroidery machine at the time). I didn't do too bad.


Of course, while I was at it, I made a name plate for Rance because I knew eventually Anthony would outgrow it and Rance would be able to wear it. I wanted to get more use out of it (I mean if I'm going to take the time and effort to make it, I wanted to get as much use out of it as I could).


Here is an outfit I made from Vogue Pattern #7504 (but I changed the smocking plate that I used).


This is an upclose shot of the smocking. I chose the "Yellow Jacket & Hornet" smocking plate by Ellen McCarn. I liked it because our local High School's mascot is BEES (and the smocking plate is a lot like the mascot) and the colors are black and gold. The Elementary School's mascot is HORNETS (the colors are green and gold). I got a lot of compliments on it.
Related Posts with Thumbnails